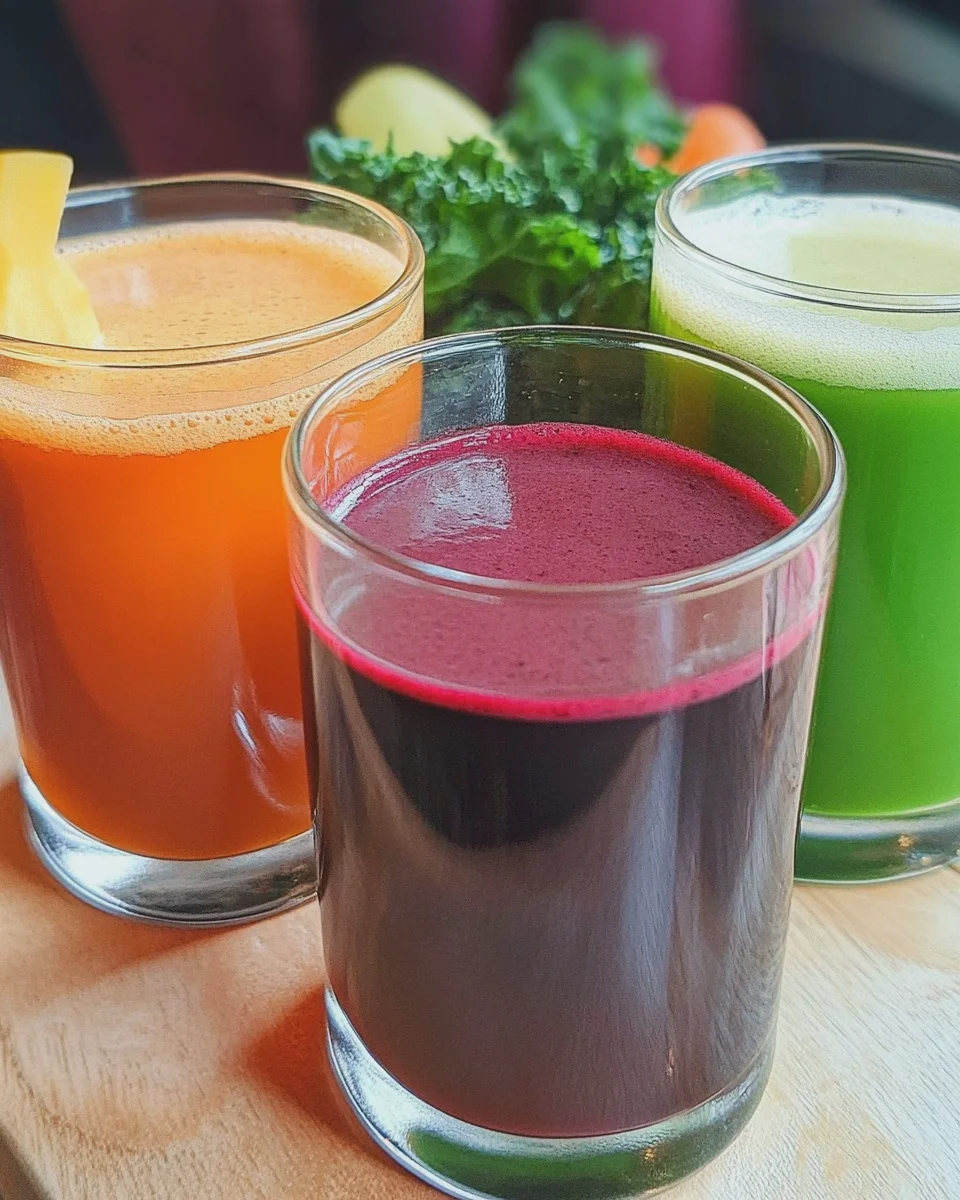
Quick and easy high veggie immune boosting juice shots for a burst of nutrition. These immunity shots without a juicer are perfect for busy mornings when you have only a few minutes to spare. Packed with vibrant colors from fresh vegetables, they are not only low in sugar but also high in essential nutrients.
Why You’ll Love This Recipe
- Convenient and Quick: Only takes 5 minutes to prepare, making it ideal for hectic mornings.
- Nutritious Boost: Loaded with vitamins and minerals that can help support your immune system.
- No Juicer Needed: You can make these shots without any fancy equipment, just a blender!
- Versatile Ingredients: Customize the recipe by swapping in your favorite vegetables or herbs.
- Low Sugar Content: High in veggies means lower sugar levels, perfect for health-conscious individuals.
Tools and Preparation
To create these immunity shots without a juicer, you’ll need some essential tools. Having the right equipment makes the process smoother and easier.
Essential Tools and Equipment
- Blender
- Nut bag or cheesecloth
- Small jug
Importance of Each Tool
- Blender: A good blender is key for mixing all ingredients smoothly, ensuring you get a well-combined shot.
- Nut bag or cheesecloth: Helps strain the juice effectively, allowing you to enjoy a smooth shot without pulp.
- Small jug: Perfect for blending smaller quantities, especially when you’re making quick shots.
Ingredients
Vegetables and Fruits
- 3 Carrots
- 1 Lemon, peeled
- 1″ Ginger
- ½ tsp Turmeric
- 1 Beetroot, including tops if possible
- 1 Apple
- 1 Lime
- 2 sticks Celery
- 1 Kiwifruit
Greens and Herbs
- 1 handful Leafy Greens like Kale or Spinach
- 1 handful Herbs like Mint or Parsley
Spices and Extras
- 4″ Ginger
- a pinch Cayenne pepper
- a few tbsp Water
How to Make Immunity Shots Without a Juicer
Step 1: Prepare the Ingredients
- Peel the citrus fruit (lemons and lime) and remove the apple stem.
- Leave all other skins on to maximize nutrition.
Step 2: Blend the Mixture
- Place all prepared ingredients into a small jug blender.
- Pulse until everything is blended smoothly.
- If needed, add some water to help with blending.
Step 3: Strain the Juice
- Pour the blended mixture into a nut bag or cheesecloth.
- Squeeze tightly to extract all the moisture from the pulp.
Step 4: Serve Immediately
Enjoy your immunity shot right after making it for maximum freshness! The nutrients begin to degrade once juiced.
Step 5: Use Leftover Pulp Creatively
The leftover pulp can be added into baked goodies such as cookies or pie crusts as a partial substitute for oats or coconut flour.
These immunity shots without a juicer are not only delicious but also an excellent way to boost your health effortlessly!
How to Serve Immunity Shots Without a Juicer
Immunity shots are a fantastic way to boost your health, especially when they are made without a juicer. Whether you’re looking for a quick morning pick-me-up or an afternoon refreshment, these shots can be enjoyed in various ways.
In a Small Glass
- Serve the immunity shot in a small glass for an energizing start to your day. The vibrant colors will make it visually appealing.
Mixed with Sparkling Water
- Combine the juice shot with sparkling water for a fizzy twist. This adds hydration and makes it a refreshing drink option.
As Part of a Smoothie Bowl
- Pour the immunity shot over a smoothie bowl. This enhances the flavor and adds extra nutrients to your breakfast.
In Shot Glasses for Sharing
- Present the shots in individual shot glasses for gatherings. It’s an excellent way to share the health benefits with friends and family.
With Fresh Herbs as Garnish
- Top each shot with fresh herbs like mint or parsley. This not only enhances presentation but also adds an aromatic touch.
How to Perfect Immunity Shots Without a Juicer
Making immunity shots without a juicer can be simple and effective if you follow these tips.
- Use fresh ingredients: Choose fresh fruits and vegetables for maximum flavor and nutrition.
- Experiment with flavors: Don’t hesitate to mix different veggies and fruits to find your ideal taste combination.
- Adjust thickness: If the mixture is too thick, add more water gradually until you reach your desired consistency.
- Consume promptly: Drink your immunity shot immediately after making it to enjoy all its nutritional benefits at their peak.
- Store leftovers wisely: If you have any leftover juice, store it in an airtight container in the fridge but aim to consume it within 24 hours.
Best Side Dishes for Immunity Shots Without a Juicer
Pairing your immunity shots with delicious side dishes can enhance your overall nutrient intake. Here are some great options:
-
Avocado Toast
A slice of whole-grain bread topped with mashed avocado provides healthy fats and fiber. -
Greek Yogurt Parfait
Layer Greek yogurt with fruits and nuts for probiotics and protein that complement your juice shot. -
Nut Butter Banana Bites
Slices of banana spread with almond or peanut butter make a quick and nutritious snack alongside your shots. -
Vegetable Sticks with Hummus
Carrot, cucumber, or bell pepper sticks dipped in hummus add crunch and additional vitamins. -
Chia Seed Pudding
Prepare chia pudding overnight for a sweet treat rich in omega-3 fatty acids that pairs well with your juices. -
Oatmeal Energy Balls
Make energy balls using oats, nut butter, and seeds for a wholesome snack that keeps you fueled throughout the day.
Common Mistakes to Avoid
Making immunity shots without a juicer can be simple, but there are a few common pitfalls to watch out for.
- Skipping the peeling: Always peel citrus fruits like lemons and limes. Their peels can add bitterness to your shots.
- Not using enough water: If your ingredients don’t blend well, you might need to add more water. This helps achieve a smoother consistency.
- Ignoring freshness: Fresh ingredients yield the best flavor and nutrients. Avoid using wilted greens or old produce.
- Overlooking the pulp: Don’t throw away the leftover pulp! It can enhance baked goods and reduce waste.
- Blending too much: Blend just until smooth. Over-blending can cause heat, which degrades nutrients.
Refrigerator Storage
- Store your immunity shots in an airtight container.
- Consume within 24 hours for the best flavor and nutrition.
Freezing Immunity Shots Without a Juicer
- Use ice cube trays for portioning.
- Freeze for up to 3 months; thaw in the fridge before use.
Reheating Immunity Shots Without a Juicer
- Oven: Preheat to 350°F and warm in an oven-safe dish for about 10 minutes.
- Microwave: Heat in short bursts of 20 seconds, stirring in between to avoid overheating.
- Stovetop: Warm gently in a small saucepan over low heat until just heated through.
Frequently Asked Questions
Here are some common queries related to immunity shots without a juicer.
Can I make immunity shots without any special equipment?
Yes, you can use a regular blender instead of a juicer to make these shots.
What if I don’t have all the ingredients?
Feel free to substitute with other vegetables or fruits based on what you have available.
How often should I drink immunity shots?
Incorporating them into your daily routine can boost your nutrient intake, but consult with a health professional for personalized advice.
Are immunity shots without a juicer healthy?
Absolutely! They are packed with vitamins from veggies and fruits while being low in sugar.
Final Thoughts
These immunity shots without a juicer offer an easy way to boost your nutrition quickly. Their vibrant flavors and colors make them enjoyable for everyone. Plus, you can customize the ingredients based on your preferences or what’s in season. Give this recipe a try and discover how delightful homemade juice shots can be!
Immunity Shots Without a Juicer
Revitalize your mornings with these quick and easy Immunity Shots Without a Juicer. Packed with vibrant vegetables and fruits, these nutrient-rich shots deliver a powerful boost to your immune system in just 5 minutes. Perfect for busy lifestyles, they require no fancy equipment—just a blender! Customize the ingredients based on your preferences while enjoying a low-sugar beverage that’s high in vitamins and minerals. Whether you’re looking for a refreshing start to your day or an afternoon pick-me-up, these immunity shots are as delicious as they are nutritious.
- Prep Time: 5 minutes
- Cook Time: N/A
- Total Time: 0 hours
- Yield: Approximately 2 servings 1x
- Category: Drink
- Method: Blending
- Cuisine: Healthy
Ingredients
- 3 Carrots
- 1 Lemon, peeled
- 1 inch Ginger
- ½ tsp Turmeric
- 1 Beetroot (including tops)
- 1 Apple
- 1 Lime
- 2 sticks Celery
- 1 Kiwifruit
- Handful of Leafy Greens (Kale or Spinach)
- Handful of Herbs (Mint or Parsley)
Instructions
- Peel the lemon and lime, remove the apple stem, and leave other skins on.
- Blend all ingredients in a small jug blender until smooth; add water if needed for consistency.
- Strain the blended mixture through a nut bag or cheesecloth to extract juice.
- Serve immediately for maximum freshness and enjoy!
Nutrition
- Serving Size: 1 shot (100ml)
- Calories: 45
- Sugar: 9g
- Sodium: 50mg
- Fat: 0g
- Saturated Fat: 0g
- Unsaturated Fat: 0g
- Trans Fat: 0g
- Carbohydrates: 11g
- Fiber: 2g
- Protein: 1g
- Cholesterol: 0mg